Using 1Password
- Vault Structure
- Accessing a Vault
- Adding a Password
- Adding One-Time Passwords
- Working with Tags
- Conventions & Requirements
- Google Chrome Extension (Optional)
- Dark Web Monitoring
Vault Structure
Passwords are stored in containers known as Vaults. Vaults can be thought of as a folder with its own set of permissions controlling access to the files (aka. passwords) stored within. Anyone with access to the vault can see/modify/delete passwords created by themselves and others. In 1Password, three types of vaults exist:
- Private
- Personal (exist, please do not use)
- Shared
Private Vault
The Private vault is a built-in vault that allows you to store credentials only you should see. Accessible only to you, this vault is automatically created when you enrolled in 1Password; it cannot be deleted.
IT Support can access Private vaults if authorized by the partners or the employee who owns the Private vault.
Shared Vaults
Currently the following shared vaults exist:
- GB Administration
- GB Corporate
- GB Benefits
- GB Investments
- GB Pension
- GB Pen Invest
- GB Shared
- SISS Corporate
- SISS Shared
As with Private and Personal vaults, Shared vaults will appear within the left-hand column of the 1Password app under the Vaults heading.
Accessing a Vault
Using the 1Password app, vaults can be access via the left-hand sidebar. As discussed in the Vault Structure article, each vault contains the shared credentials for each department, with an exception being the Private Vault which only you have access too.
If you are missing a vault, please speak with your manager.
1. Open the 1Password app and login.
2. Within the left-hand sidebar select the vault you'd like to view.
Adding a Password
This article will walk you through adding a new password into the 1Password app. We'll start by determining what type of login we would like to save than move onto adding the login details.
If using the 1Password extension or mobile app the basic steps are the same however the UI may look different.
1. Logon to the 1Password app.
2. Within the left-hand sidebar, select the vault you'd like the password to be saved in.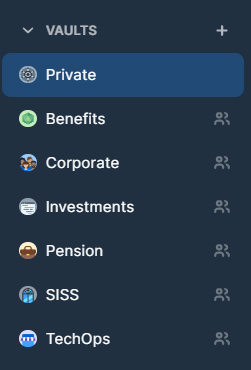
3. In the top right-hand corner, select + New Item.![]()
4. Select the type of credential you'd like to add. If unsure select Login (the most common type).
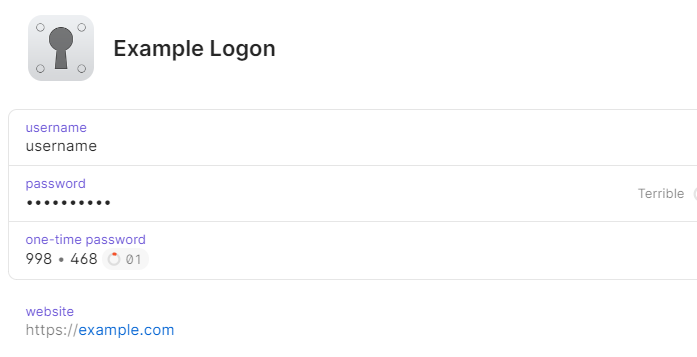
Fill in the Details
A window will appear asking for the account details. We'll go through each section separately.
While overwhelming, only a few fields need to be filled in.

1. Enter what you'd like to call this account, for example the company name.![]()
2. Enter the account's username and password.
3. Enter the account holder's website (optional but helpful).
![]()
5. Lastly, click Save to save the new login.
Adding One-Time Passwords
One-Time Passwords (OTP) are a common type of multi-factor authentication that uses a combination of a passphrase (just a random set of characters) and the time to generate a ever changing 6-digit passcode. The service you're logging into is then able to use the time and the six digit code to determine the original passphrase, validating your identity.
To add a One-Time Password start by selecting the credential you'd like to add the One-Time Password onto. Choose Edit in the top right-hand corner. A new window will appear, allowing you to edit the credential.

Select Add more and choose One-Time Password. A new field will appear asking for the passcode.

Password provides two different methods of entering in the passcode, via QR code or by manually entering in the One-Time Password passphrase. By default most sites will provide you with a QR code, however sometime reading the QR code fails and entering the passphrase in manually may be the best option.
QR Code
To scan and have the passphrase entered into the 1Password One-Time Password field, please:
- Ensure that the QR Code is visible on the screen when 1Password is open.
- Press the Scan symbol to have 1Password read and fill in the passphrase.

Manually Enter the Passphrase
Alternatively, some sites (unfortunately not all) will allow you to see the underlying passphrase instead of the QR Code. If this is the case, simply copy and paste the passphrase into the One-Time Password field in 1Password.

4. Select Save. You should now see a rotating One-Time Password for your credential.
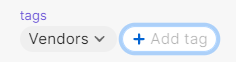
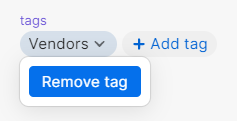
Working with Tags
Please see 1Password's Support Article for more information on using tags.
Applying a Tag
The following is a quick how-to on adding a tag to an existing item.
1. Open the 1Password app.
2. Select the item you'd like to add the tag too.
3. Select Edit within the top-right hand corner.

4. Under the Tag section, select Add Tag and type in the tag you wish to add.
5. If you wish to remove a tag, select the tag a choose Remove Tag.
Conventions & Requirements
Separate Logins for Each Site
Each site/username/password combo should be a separate login. This allows autofill to work correctly display and autofill the logon details when searched/presented. Ex. BlackRock.
Security Questions
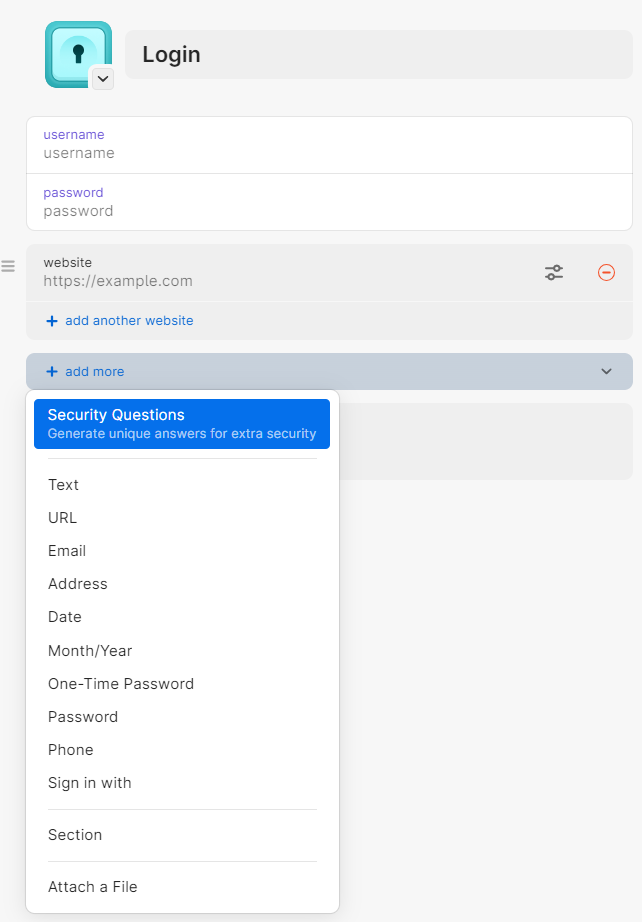
When adding security questions information to a logon, ensure this information is added to the Security Question field and not a generic text or notes field. This will allow autofill to correctly locate and autofill the information when its requested.
To add a Security Question field to a logon, select add more and choose Security Question from the drop-down.
Tagging
- Sub-codes/suffixes are currently excluded (hyphenated billing codes only in use where the hyphenation is for a SEPARATE client).
Login Items with Multiple Data Room/Managers
When creating login items that have multiple data rooms and/or managers:
- Tag with CLIENT manager names (manager tags not needed otherwise). i.e., manager tags should only be used for items with multiple managers for ease of searchability.
- Sometimes data room access is granted when we’re doing a search. These managers/funds should not be tagged; just include a tag for the client for which the search is being conducted.
- myMAWER is Mawer’s proprietary/dedicated site and contains Mawer in the title, so a “Mawer” tag need not be included.
- Create new Section = Data Room, Text “title” = Fund/Manager name, Text = client billing codes.
Multi-Factor Authentication
It's preferred that whenever possible the built-in 1Password MFA authentication mechanism be used for storing and reading MFA codes. If not available, configure MFA to email investmentreports@georgeandbell.com.
As a last resort, use your personal Duo, Microsoft Authentication apps or SMS. These options are not preferable as it does not allow anyone else to logon to the account without your device.
To add a MFA code onto a 1Password logon item, please:
- Choose the logon item you'd like to add the MFA code to.
- Select Edit within the top right-hand corner to edit the item.
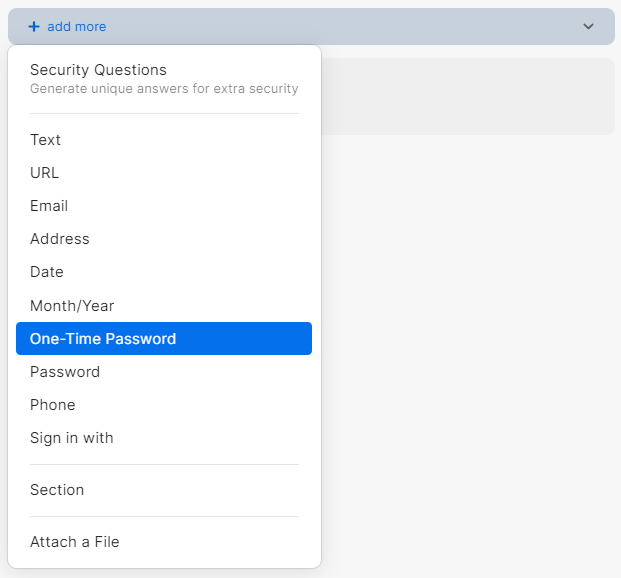
- Select add more and choose One-Time Password.

- Select the little square symbol to have the QR code scanned from the screen.
If not working, many sites allow you to copy/paste the code directly into the field.

Password Creation
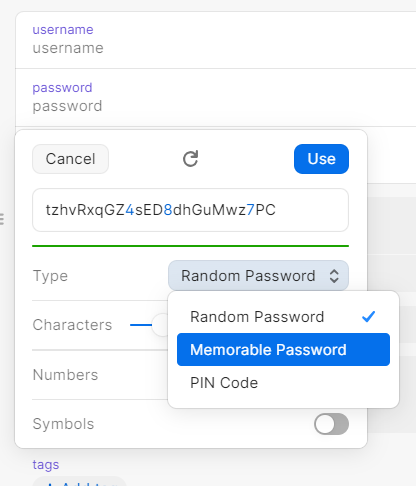
By default 1Password uses their Smart Password generator, which generates a password as a random series of characters. This is the preferred option, however at times may not meet the password requirements of the site or it may be preferable to have a password that's memorable. To change how 1Password generates the password:
- Under the logon item you're editing/creating select the password field.
- 1Password should automatically prompt to Create a New Password. Select this option.
- In the resulting drop-down update Type to you're preferred password generating mechanism.
Google Chrome Extension (Optional)
Installing Extension
The Google Chrome 1Password extension is available and can be installed via the Google Chrome web store. To install the extension, please:
- Browse to the 1Password Extension page on the Google Chrome Web Store.
- Select Add to Chrome, to install the extension.
By default, the extension may be hidden from view. To have the extension always conveniently available, perform the following steps:
- Press the Extension icon
 within the top-right hand corner.
 - Select the Pin icon
 directly next to the 1Password - Password Manager extension.
 - The extension should now be immediately available in the top right-hand corner .

Sign In
Before using the 1Password extension, you need to sign-in to your 1Password account. Please click on the 1Password extension ![]() to view the 1Password sign-in page. Press Sign In to start the process.
to view the 1Password sign-in page. Press Sign In to start the process.
For more information on how to sign-in to 1Password, please see Accessing Your Account.
Dark Web Monitoring
Dark web monitoring is a service that searches for and monitors information found on the dark web. The service looks for stolen and/or leaked information, such as compromised passwords, credentials, intellectual property, and other sensitive data being shared and sold among criminals operating on the dark web. This information can include:
- Credit card details.
- Account credentials.
- PII information (name, address, phone number etc.)
If this information is found, a breach report is generated and the associated employee(s) are notified. Additionally IT is notified so immediate action can be taken if required.
FAQ
Answers to commonly asked questions.
What do I do if I receive a breach report?
Check and see if any of your accounts are at immediate risk of being accessed by an unknown person. If yes, change your password immediately and notify IT. For certain types of reports such as web scrapping unfortunately little can be done other than being vigilant as you'll be at increased risk for identify theft.
IT receives all breach reports and will reach out if concerned. If the breach is considered significant, the affected accounts may be temporary disabled with no notice to you to ensure the security of the company.
How does 1Password determine that a breach has happened?
After a company or individual has been compromised, it's common for the hacker to either:
- Attempt to sell the information online (usually on the dark web).
- Publicize the information.
1Password looks for these types of posts and analyzes any information collected. If information related to George & Bell Consulting is found, a breach report is generated.
I recently learned that my personal information was collected. What can I do about it?
Be vigilant as you'll be at increased risk of identity theft with your personal information publicized. Here are a few steps you can take to protect yourself:
- Monitor your credit cards and call the credit card company immediately if anything is amiss.
- Place a credit freeze on your name. This will stop any identity thieves from opening any account that includes a credit check (loans, credit card etc.).
- Don’t be truthful when setting up security questions. For example, when asked what city you were born in, lie. (but do document it so you can remember it!)
- Call various providers to see if they can add additional security checks as part of verifying who you are.
If you do become the victim of identity theft, the recommended approach is to:
- notify your financial institution and the local police.
- contact the CRA at 1-800-959-8281.
- report the theft to a credit reporting agency such as Equifax or TransUnion.
- keep records of recent purchases, payments, and financial transactions.
- Call 1-800-O-Canada (1-800-622-6232) for information on how to replace identity cards such as your health card, driver’s license, or SIN if necessary.
Where can I learn more about this service?
Please visit 1Password's Support site.
What can I do personally if my information is released?
Monitor your credit cards and call the credit card company immediately if anything is amiss. Common signs of identity theft include:
- Receiving an application for credit in your name
Your bank informing you that they have approved/denied your application for a service you never applied too - No longer receiving a statement and finding unusual purchases.
If extremely concerned, you can place a credit freeze on your name. This will stop any identity thieves from opening any account that includes a credit check (loans, credit card etc.).
- Don’t be truthful when setting up security questions. For example, when asked what city you were born in, lie. (but do document it so you can remember it!)
- Call various providers to see if they can add additional security checks as part of verifying who you are.